

1. Settings
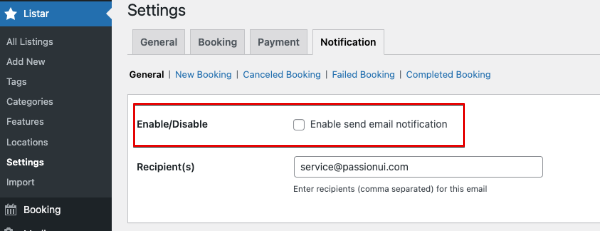
Enable Notification
Check the setting from the WordPress CMS menu Listar > Settings > Notification > General and enable this option
Notification Content
There have 4 kind of notification contents.
- New Booking: when got new booking from the user
- Canceled Booking: when user canceled their booking
- Failed Booking: when the process payment is failed for some reason from the Payment Provider
- Completed Booking: when the process payment is completed from the Payment Provider or by the user
Example: Update title & content for the New Booking
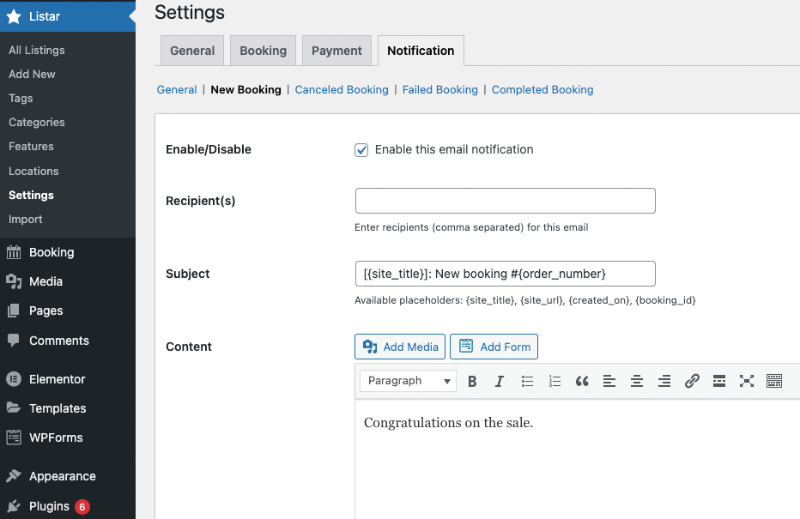
- Enable/Disable: check on the checkbox when need send email notification
- Recipient(s): Enter receivers email and separate by the comma
- Subject: notification subject
- Content: notification content
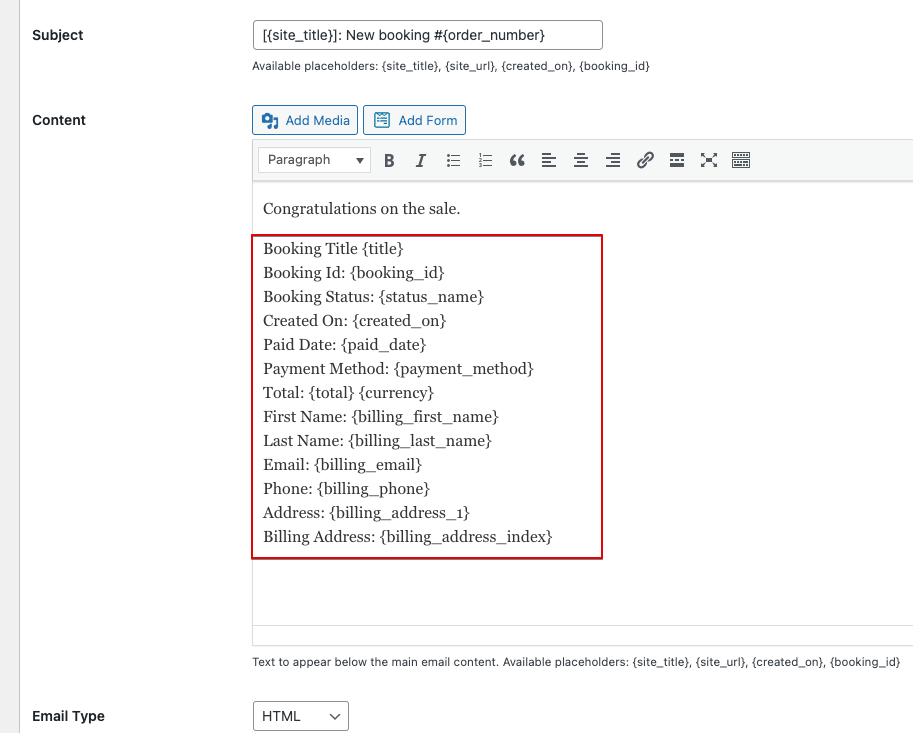
The notification content/subject are supporting data fields
- title: booking title name | Example: Booking 0075
- booking_id: booking number | Example: 0075
- status_name: status name of the booking | Example: Pending, Canceled, Failed
- status_color: booking hex color | Example: #e5634d
- created_on: created date booking | Example: 2021-12-26 11:08:56
- paid_date: date process payment | Example: 2021-12-26 11:08:56
- payment_method: payment method name | Example: PayPal Checkout V2, Stripe
- total: total amount value | Example: 39
- currency: the currency symbol | Example: USD
- billing_first_name: user first name | Example: Steve
- billing_last_name: user last name | Example: Garrett
- billing_email: user email | Example: [email protected]
- billing_phone: user phone | Example: 082 9923 12331
- billing_address_1: user address | Example: Mr. M. Rajendran Blk 35 Mandalay Road # 13–37 Mandalay Towers Singapore 308215
- billing_address_index: user full address | Example: Mr. M. Rajendran Blk 35 Mandalay Road # 13–37 Mandalay Towers Singapore 308215 [email protected] 082 9923 12331
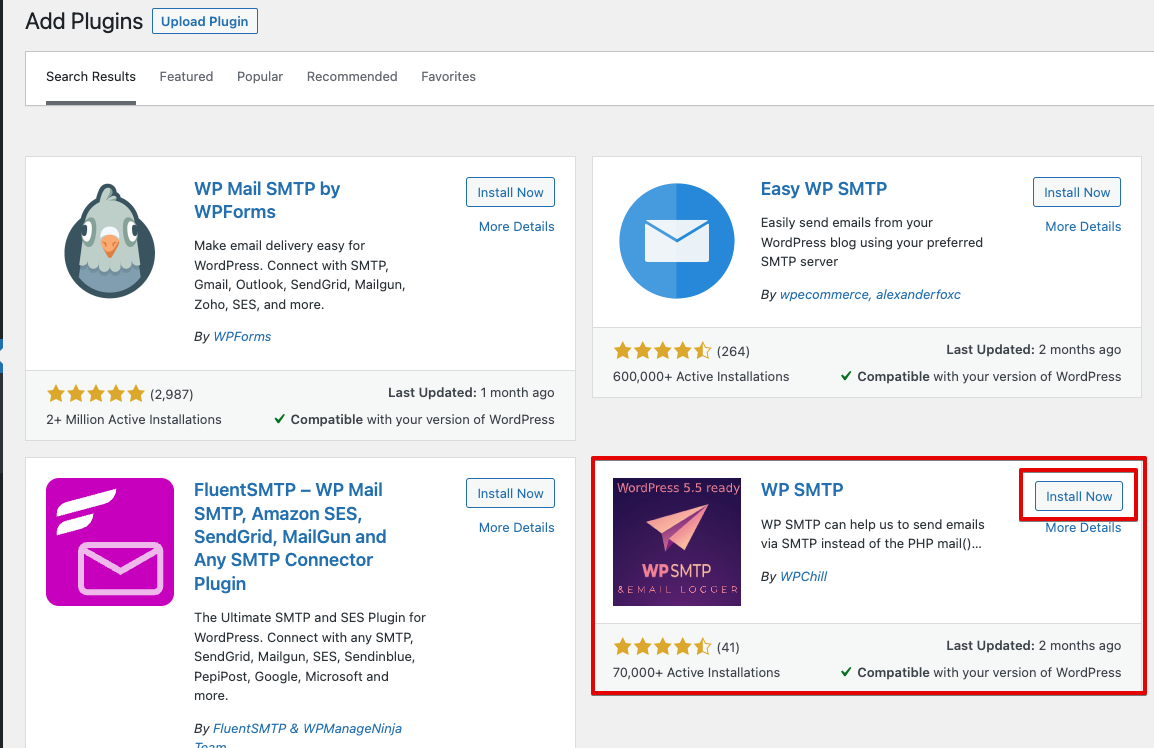
2. Install the WP Mail SMTP
The booking supports send email notification feature. If your WordPress site is already installed or supported by the send email function then you can skip this step. Otherwise, we recommend install the WordPress plugin WP Mail SMTP (https://wordpress.org/plugins/wp-smtp/)
- From your WordPress Admin Panel
> Plugins menu
> Add New button
> Search for ‘WP Mail SMTP’. - Click Install.
After installed the WP SMTP WordPress plugin. Please do some more steps to complete the setting.
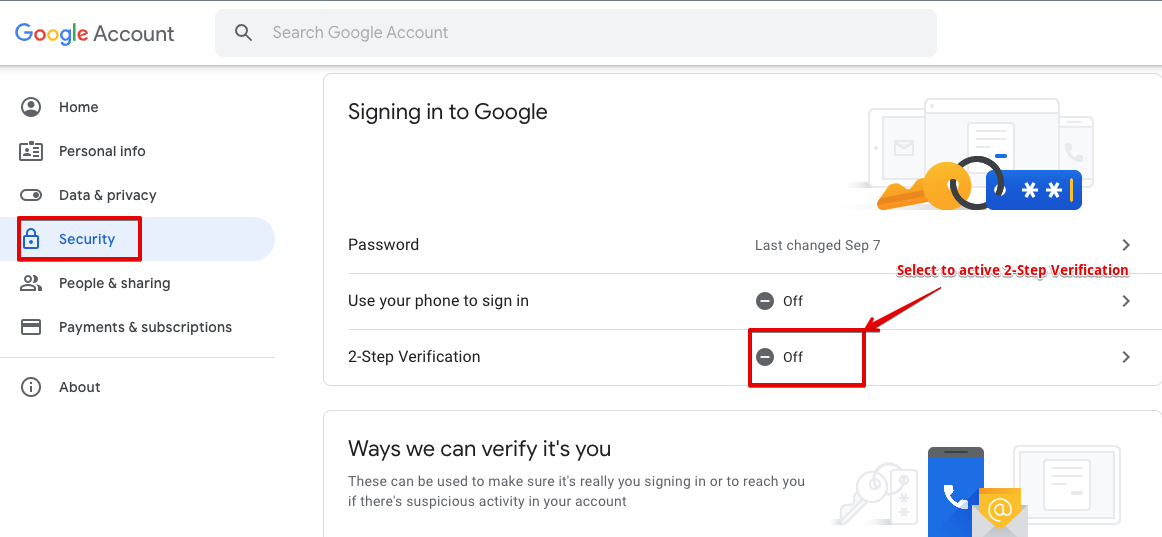
Enable Google SMTP 2-Step Verification
The WP SMTP WordPress plugin work with SMTP protocol. You need to enable Security > 2-Step Verification. First please access your google account page via the URL https://myaccount.google.com/.
From the left menu, select Security > 2-Step Verification then enable this option
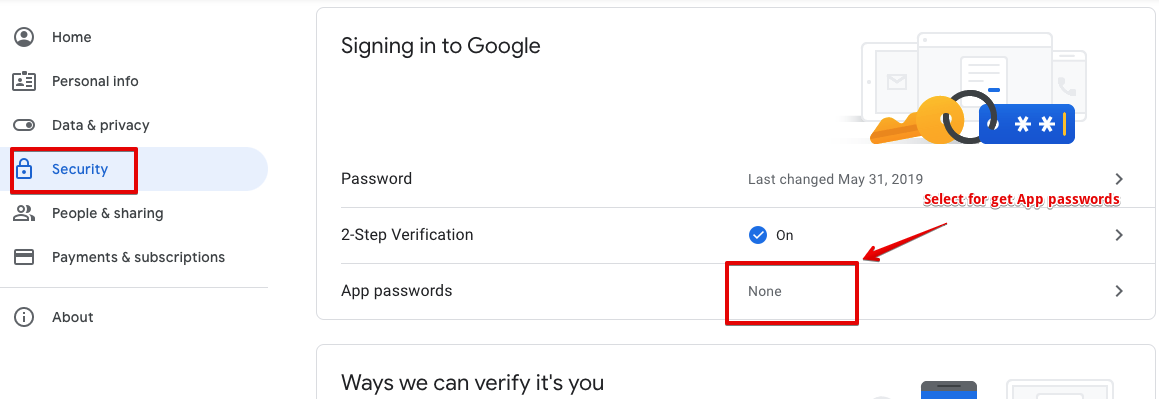
Select App passwords option for generating the SMTP App password. This password will be used for your WordPress CMS setting
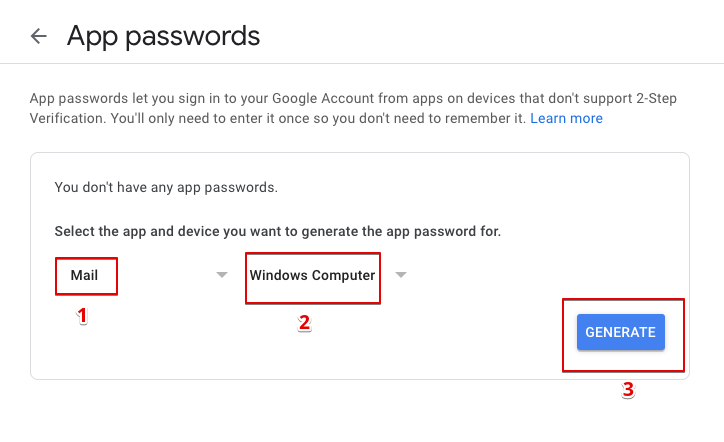
- Select Mail app
- Select Windows Computer device
- Generate
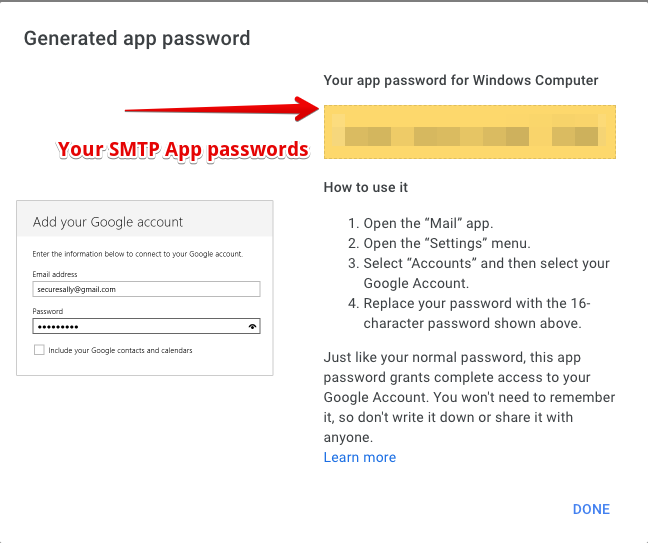
WP SMTP > Settings
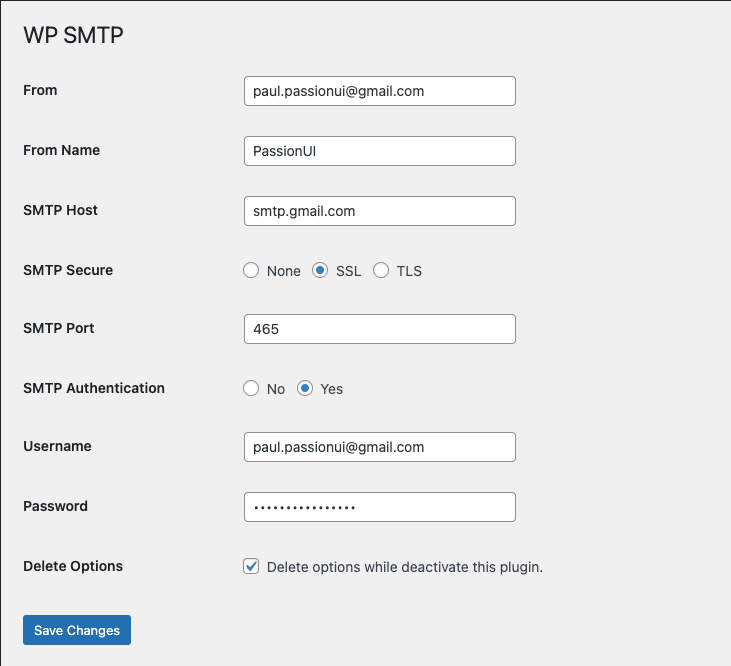
- From | Username: please input the email address that you have used for generating the SMTP app password
- From Name: Sender name. It’s free input
- SMTP Secure: Select SSL
- SMTP Port: Input port 465 value
- SMTP Authentication: Select option Yes
- Password: please input the password has been generated from your Google account
WP SMTP > Mail Logs
Your configuration steps may be wrong during inputting the setting value. For make sure the send email function is working properly, please access the WordPress CMS menu WP SMTP > Mail Logs and check the result.
