Welcome To Mazi – News & Magazine For React Native Mobile Template documentation.
Firstly, a huge thanks for purchasing this template, your support is truly appreciated!
This document covers the installation and use of this template and often reveals answers to common problems and issues – read this document thoroughly if you are experiencing any difficulties. If you have any questions that are beyond the scope of this document, feel free to pose them in the dedicated support section.
Template Features
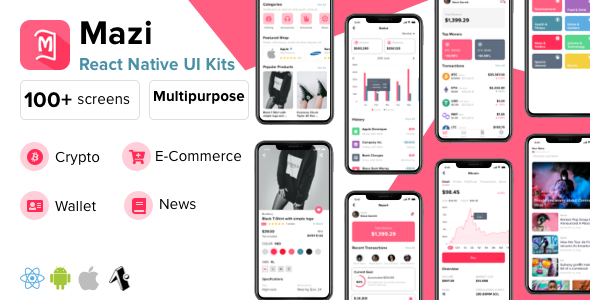
100+ different sample screens
Flexible home screen: Cryptocurrency, Wallet, News, E-commerce
The Mazi React Native UI KIT supports both React Native Cli and Expo Cli (Managed Workflow)
System Requirements
NodeJS
Make sure you have a recent version (15.11 or later) of Node installed globally. We recommend installing Node and Watchman using Homebrew. Run the following commands in a Terminal after installing Homebrew:
brew install node
brew install watchman
Expo Cli
If you prefer Expo Cli more than React Native Cli, this project is also supported. Please run the command below Terminal
npm install -g expo-cli
Please read more official web page for how to use Expo in detail https://docs.expo.io
React Native Cli
Node comes with npm, which lets you install the React Native command line interface. Run the following command in a Terminal:
npm install -g react-native-cli
Getting Start With Expo CLI
After unzip the download pack, you’ll found a source-expo folder with all the files. Open a Terminal in source-expo folder and run command
Mazi – Source Expo
cd ./source-expo
npm install
expo start
After you run the command successfully then you can find the result like the image below.
Mazi – Expo command
Please install the Expo demo app via Apple Store or Play Store. Then use your phone scan the QR code above for demo the Mazi app (please make sure your phone and your computer are using same the network connection)
Getting Start With React Native CLI
After unzip the download pack, you’ll found a source folder with all the files. Open a Terminal in source folder and run command
Mazi – Source
IOS
Install node modules
cd ./source
npm install
Install cocoapods
sudo gem install cocoapods
cd ./ios
pod update
pod install
Link fonts and resource icons
npx react-native link
Run with Ios Simulator by the command
open -a Simulator
npx react-native run-ios
Mazi – IOS Simulator
Android
Before getting started, please read thoroughly this React Native official docs for how prepare with Android development https://facebook.github.io/react-native/docs/getting-started After you finished setup for Android, we will move to next step
Install node modules
cd ./source
npm install
Link fonts and resource icons
npx react-native link
Start a development server by the command
npx react-native start
Using your Android Studio (3.5.3 or last version) and build project with folder ./source/android
Mazi – Android Studio Build
After then please do following steps below
Step 1: ADM Manager – Install your virtual devices for use
Step 2: Sync project with Gradle files
Step 3: Select virtual device and Run your application
Mazi – Android Studio Build with Virtual Device
Video Installation Guide
We also made video for how to set up for Ios and Android
Source Structure
Config Files
File locate: ./app/config/..
color.js: config theme color for the app
images.js: all images use for the app
setting.js: common setting value
theme.js: common basic StyleSheet
typography.js: define common FontFamily, FontWeight, Typography system
Components
File locate: ./app/components/..
Common components that could be used many times in your app: Button, Icon, Text, Filter Sort, Text, Start Rating …
Navigation
File locate: ./app/navigation/..
index.js: Define first loading screen
main.js: Define default screen & router for link to other screens (Home, Category, Place, Wishlist, Account, Settings, Change Password …)
Templates
File locate: ./app/screens/..
Then navigation has defined in ./app/navigation/main.js will link with screens locate in folder ./app/screens/..
All template design of the app are locate in here (./app/screens/..). You could change or re-structure by matching with your own project structure design.
Assets
File locate: ./app/assets/..
You can store images or other file resource in this folder
Data
File locate: ./app/assets/data/..
This project doesn’t connect APIs or backends instead of json data. All display data of this project are using a JSON file (*.json). You can checkout and modify or add more data directory listing if you want
Redux
File locate:
./app/store/index.js
./app/actions/..
./app/reducers/..
Contain main action and reducers
With React Native template, we’re not focus much about redux, we just make sample authentication as temp for control simple login screen
Utils
File locate: ./app/utils/..
Commons function for use in the app will be put here, So if you develop or add more common functions, just add it here !
Theme
Font Family
The default font family name “Raleway” are being used for this template. If you need change or a custom font to be the prettiest? You’ll need the .ttf files for all supported styles (thin, ultraLight, light, regular, medium, semibold, bold, heavy, black …). Here are the few steps you need to add it.
Add more font family in folder ./app/assets/fonts/..
Change default font name (You can keep default font and add more prop with new font). Open file ./app/config/typography.js
export const FontFamily = {
default: "Roboto"
};
Color
The template are using color palette following format by image below
Mazi – Color Pattern
You can change the theme prop dynamically and all the components will automatically update to reflect the new theme. Open file ./app/config/color.js
export const BaseColor = {
primaryColor: "#FF2D55", // primary color for your app, usually your brand color.
darkPrimaryColor: "#F90030", // color is darker base on BaseColor.primaryColor
lightPrimaryColor: "#FF5E80", // // color is lighter base on BaseColor.primaryColor
accentColor: "#4A90A4", // secondary color for your app which complements the primary color.
textPrimaryColor: "#212121", // text color for content.
textSecondaryColor: "#E0E0E1", // text color for content.
grayColor: "#9B9B9B", // gray color, just common using for app
darkBlueColor: "#24253D", // dark blue color, just common using for app
dividerColor: "#BDBDBD", // color for separator
whiteColor: "#FFFFFF", // white color
fieldColor: "#F5F5F5", // common field color like input, text area
yellowColor: "#FDC60A", // just another color use for the app
navyBlue: "#3C5A99" // just another color use for the app
};
The main color palettes following properties:
BaseColor (object)
primaryColor
darkPrimaryColor
lightPrimaryColor
accentColor
textPrimaryColor
textSecondaryColor
If you want to customize colors or for matching with your business colors. Just refer more with websites below for pickup right color palettes