The push notification feature works when the admin add or modify the directory via the WordPress backend then users who are using the mobile application will get the notification.
Before going to make push notification work with your application, please do steps below:
- Register FCM server key with your application ID
- Setting FCM server key with your WordPress backend
1. Register FCM server key with your application ID
1.1 Add Firebase To Your IOS App
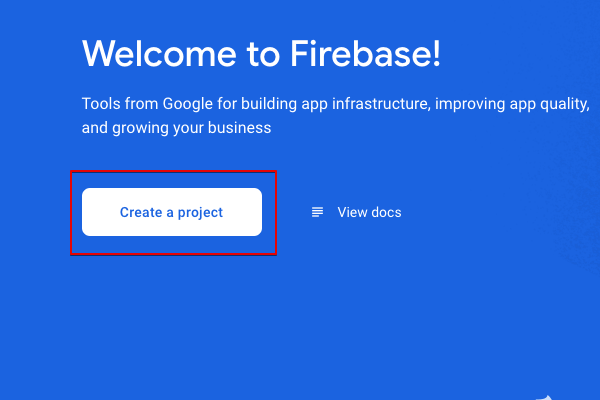
Access this URL https://console.firebase.google.com and select “Create a project”
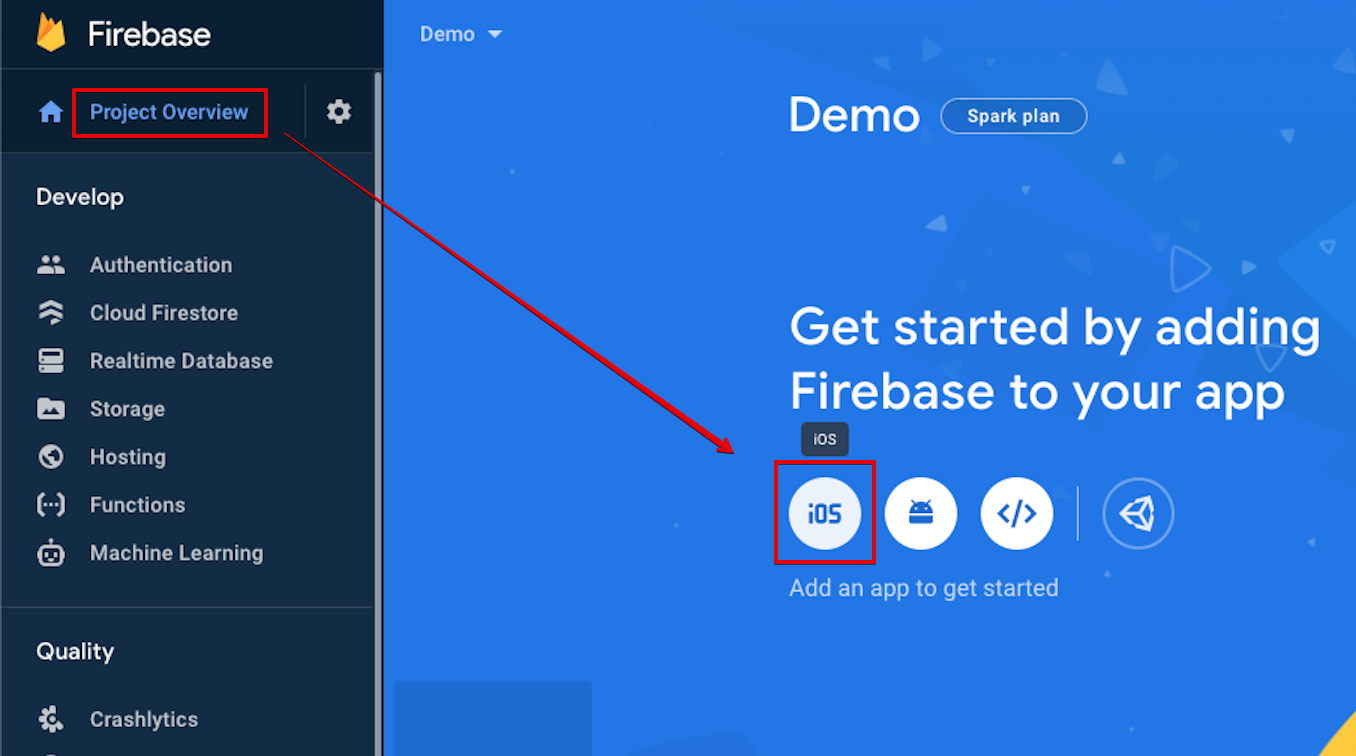
After then from the panel of your project, please select menu Project Overview > then select the IOS icon for enroll the IOS application ID
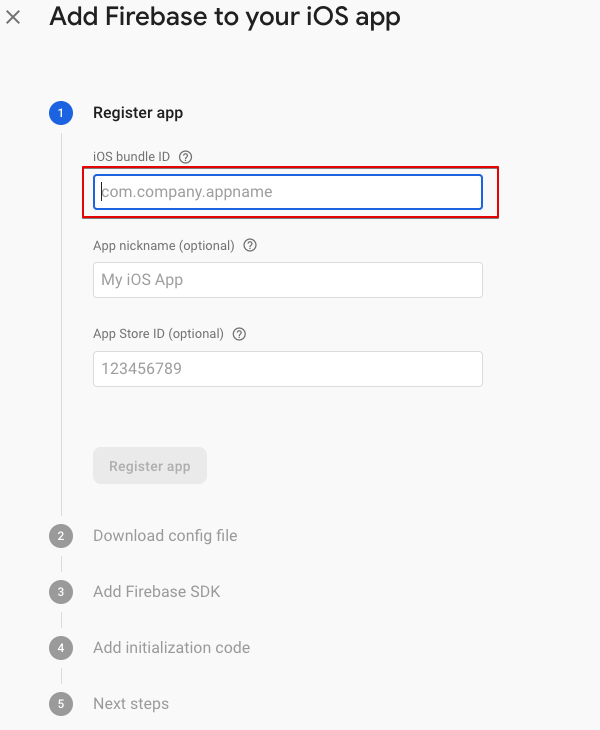
Add Firebase to your IOS app, please fill in these information
- iOS bundle Id: bundle ID taken from your application. You can look for it in the source code
./source/ios/listar.xcodeproj/project.pbxprojand find the value ofPRODUCT_BUNDLE_IDENTIFIER - App nickname: It is an optional value. This name will be used for present in the Firebase console
- App Store ID: It is an optional value. You can skip it if your application haven’t registered and published in the Apple AppSore yet
Confirm your information by button Register App
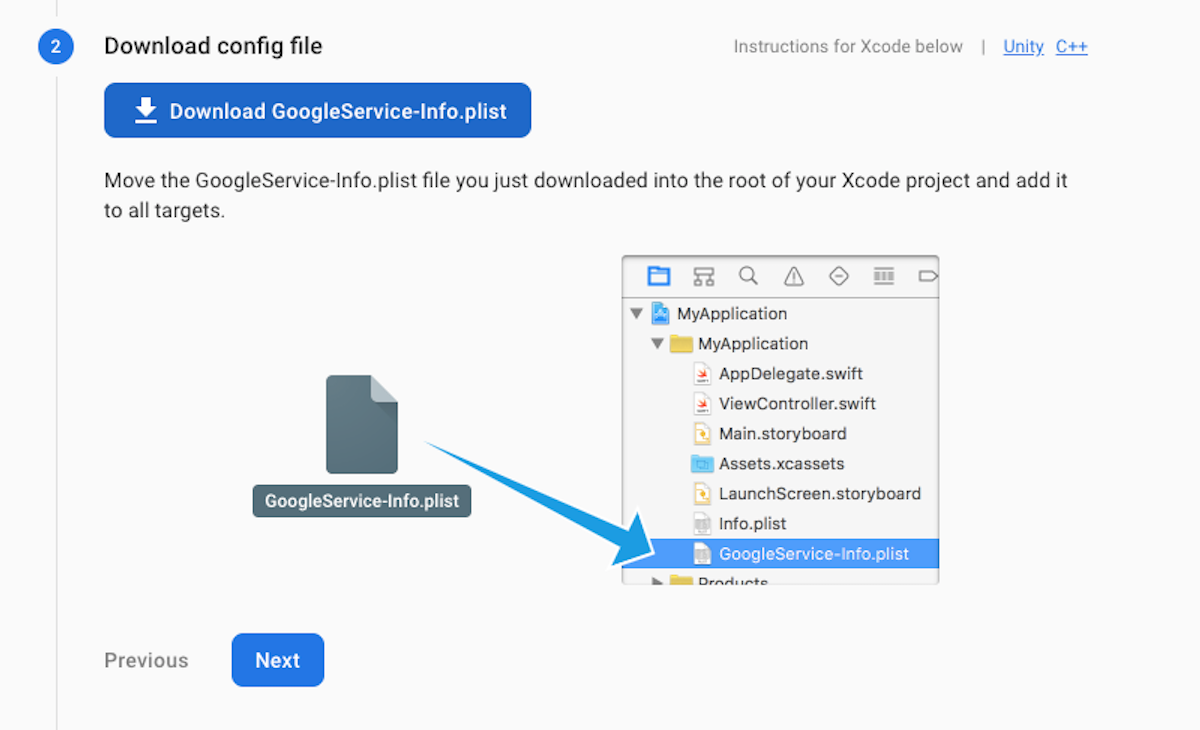
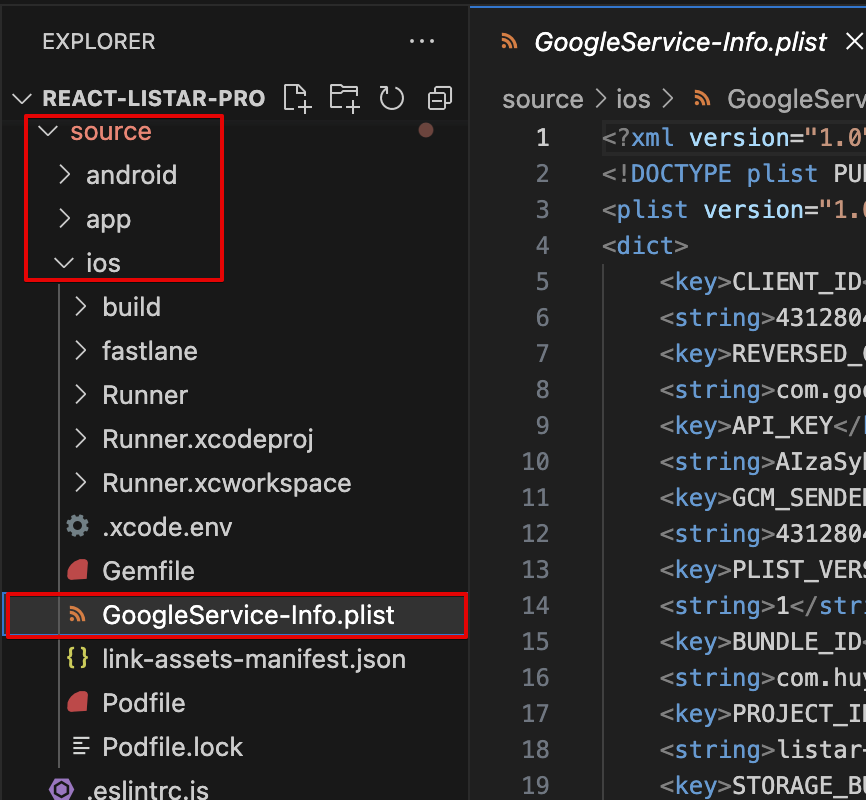
Click on the Download GoogleService-info.plist button to download the file then copy it to the ios directory of your project ./source/ios/GoogleService-info.plist . If the GoogleService-info.plist file already exists, delete the old file and copy the new file.
After you downloaded config setup then select Next button for complete add Firebase to your IOS app.
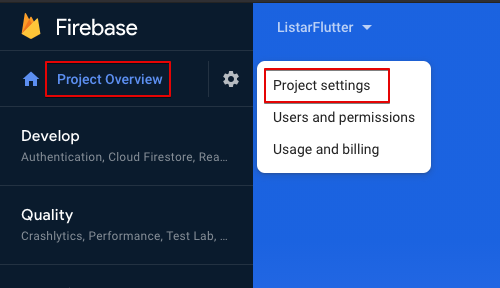
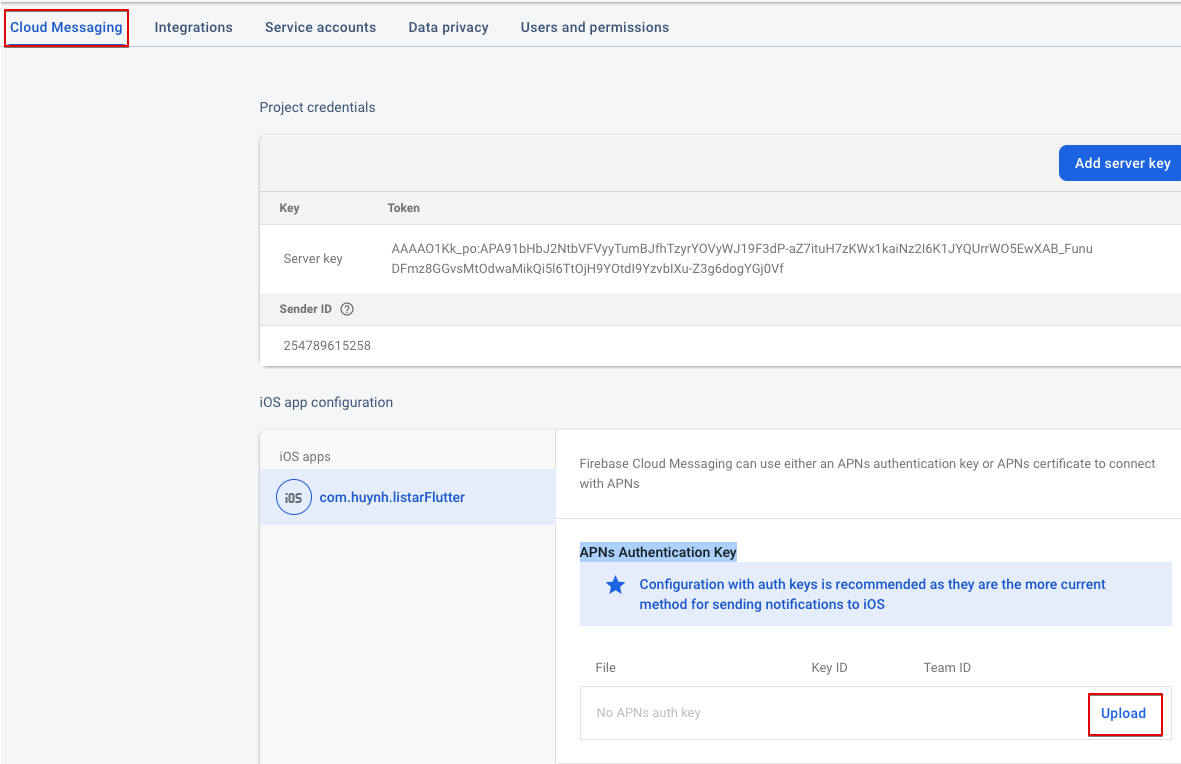
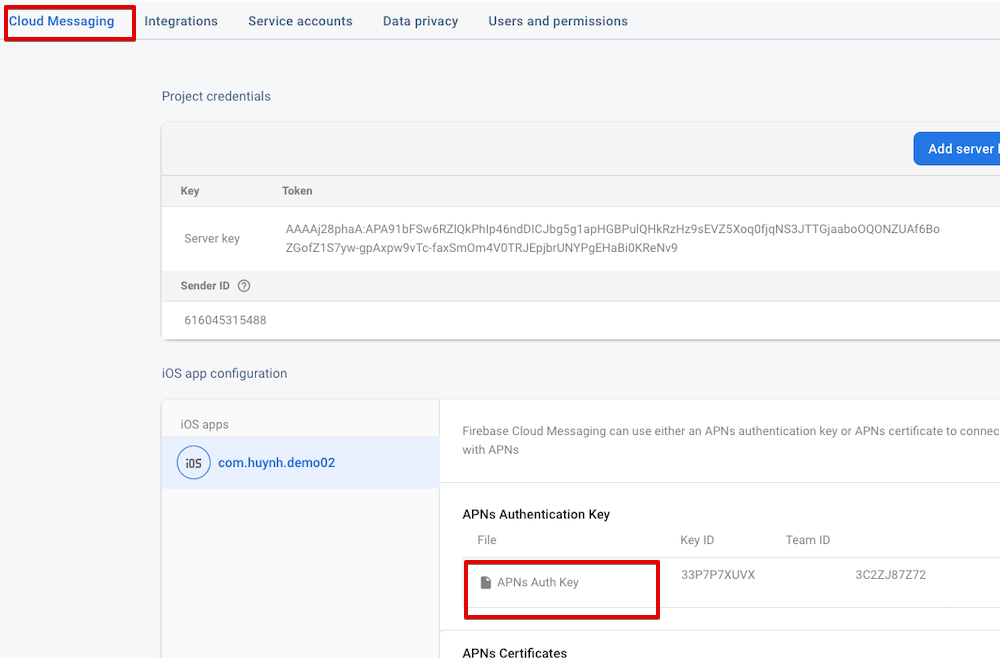
Please back your Firebase console for install Cloud Messaging to enable push notifications on iOS
Select Project Overview > Project Settings > Cloud Messaging tab
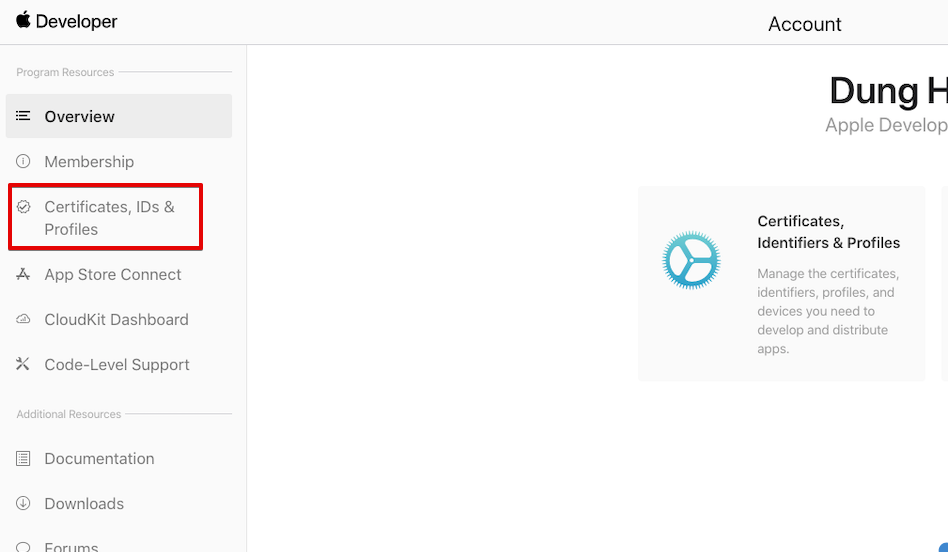
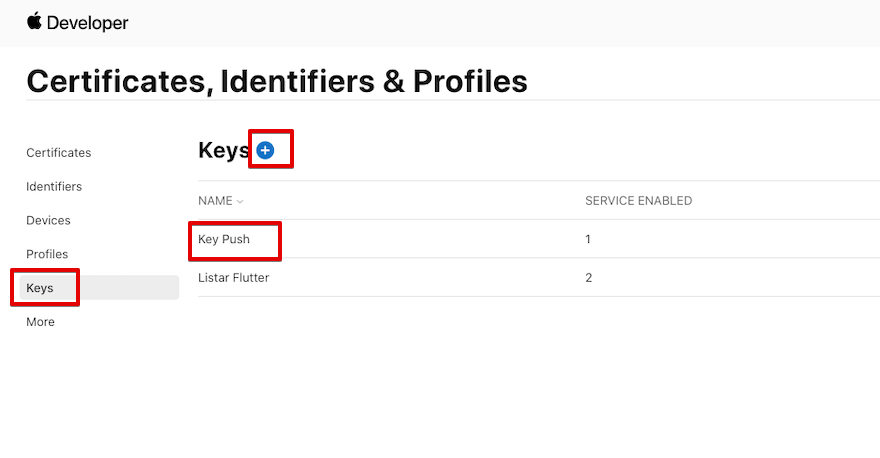
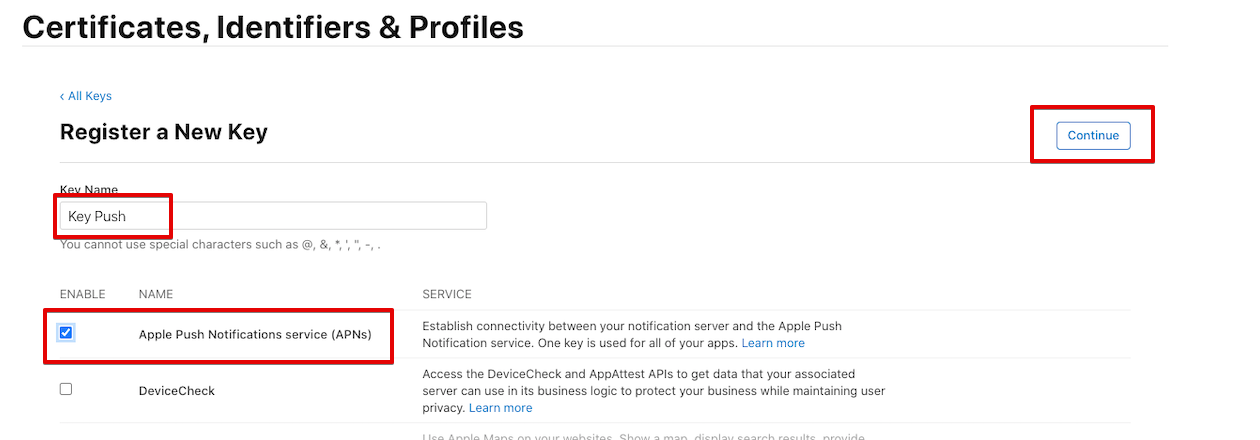
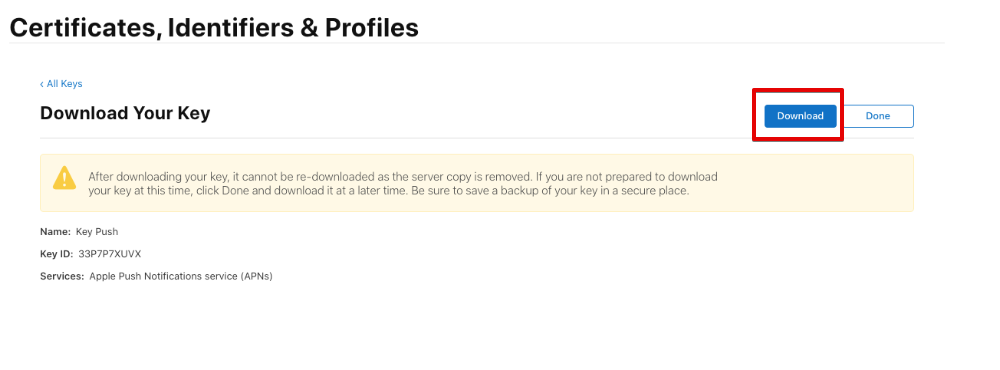
To setup the APNs Authentication Key, you must have an apple developer account. Visit page https://developer.apple.com and select your account

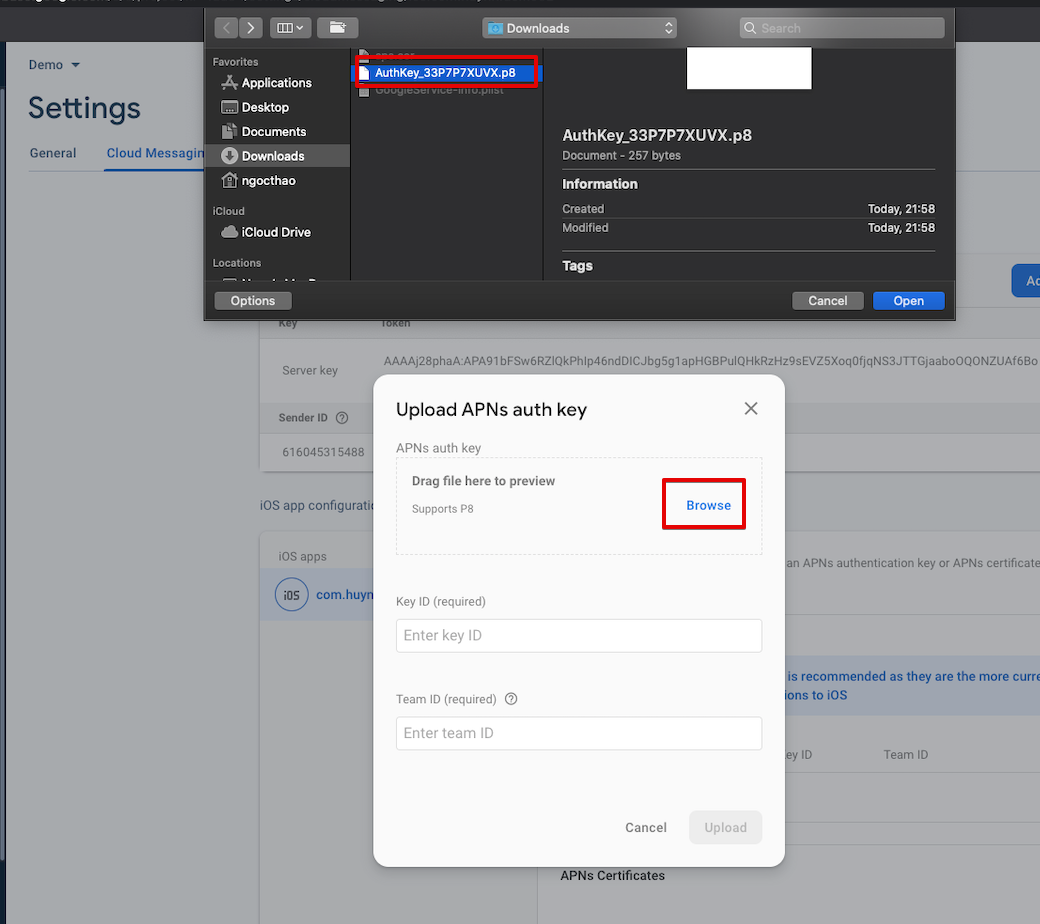
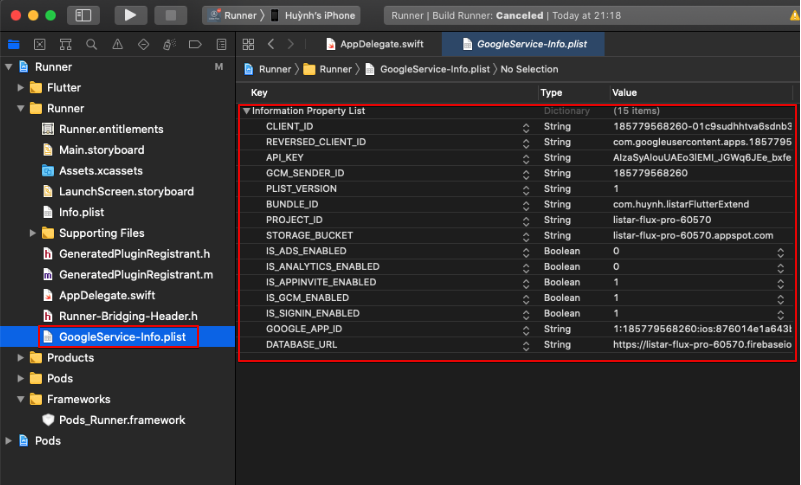
Install the push notification on source code. Please use Xcode application and open your source code ./source/ios/Runner.xcworkspace then will see the GoogleService-info.plist
For make sure the push notification has been enabled from your application. Please select Runner > Signing & Capabilities tab and make sure Background Modes options has been checked
- Background fetch
- Remote notifications
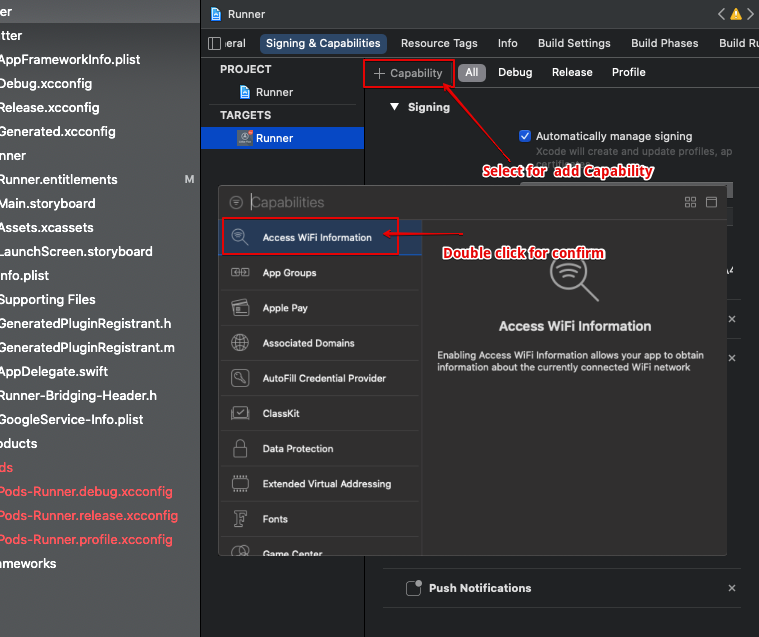
Add Capability > Push Notifications
From the Xcode application select tab Capability, in there you can double click for open the modal add new Capability and select Access Wifi Information
Then rebuild your project again, please check this Installation > Mobile Setup > https://passionui.com/docs/listar-pro/mobile-installation/mobile-setup
Then move to the next step setting > 2. Setting FCM server key with your WordPress backend
1.2 Add Firebase To Your Android App
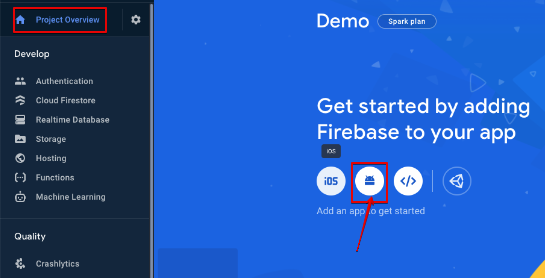
Access this URL https://console.firebase.google.com and select menu Project Overview and select the Android icon for enroll the Android application ID
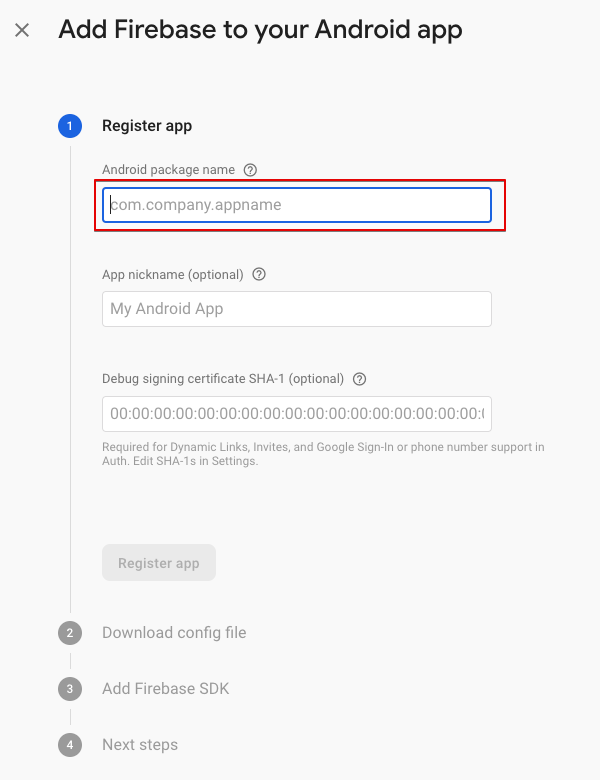
Add Firebase to your Android app, please fill in these information
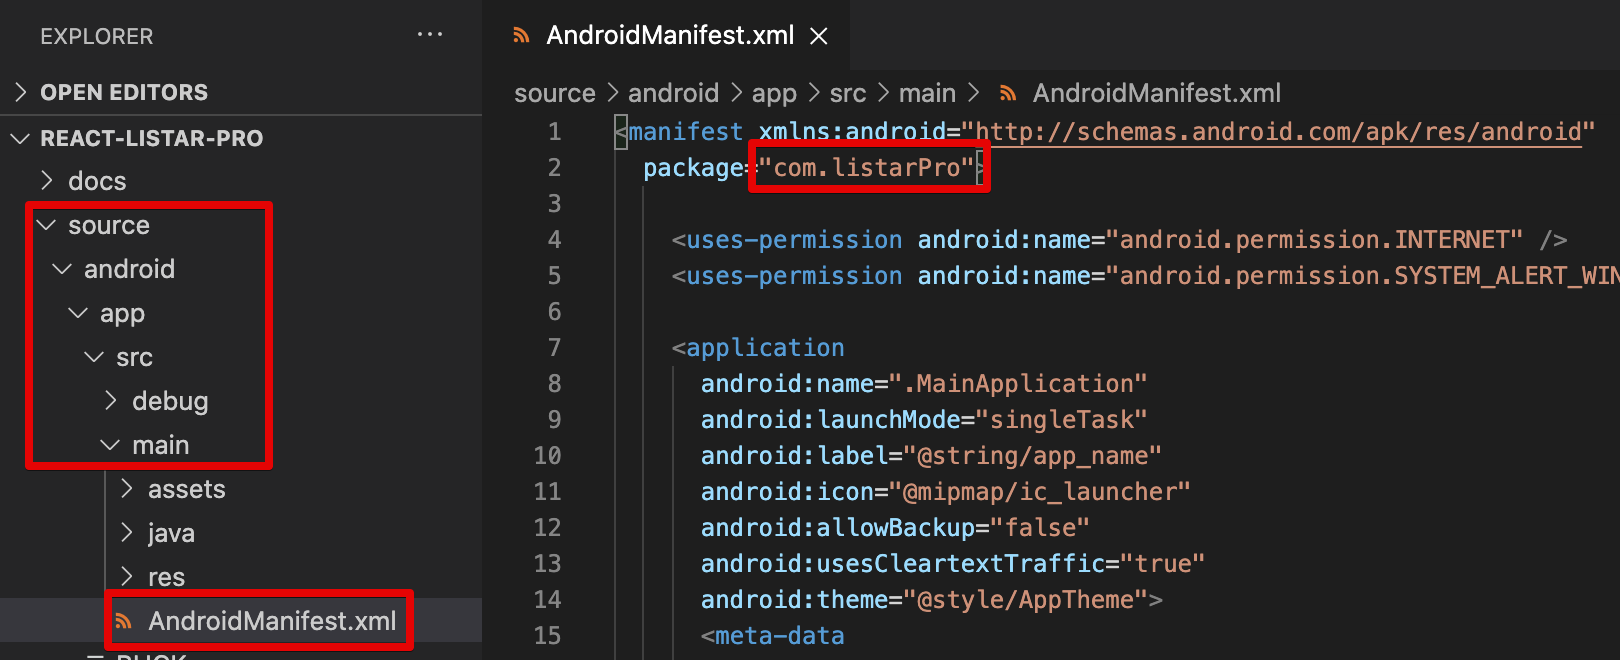
- Android package name: You can look for it in the source code
./source/android/app/src/main/AndroidManifest.xmland find the value ofpackage - App nickname: It is an optional value. This name will be used for present in the Firebase console
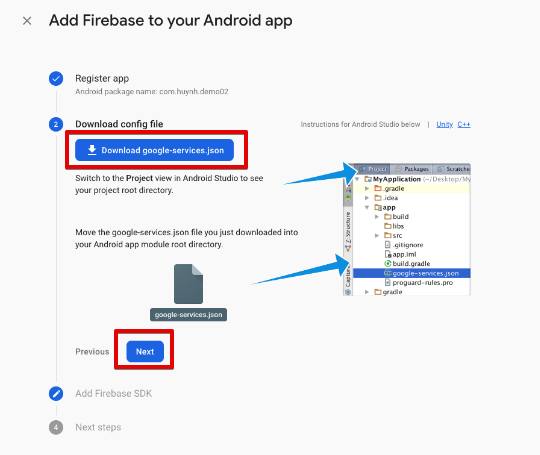
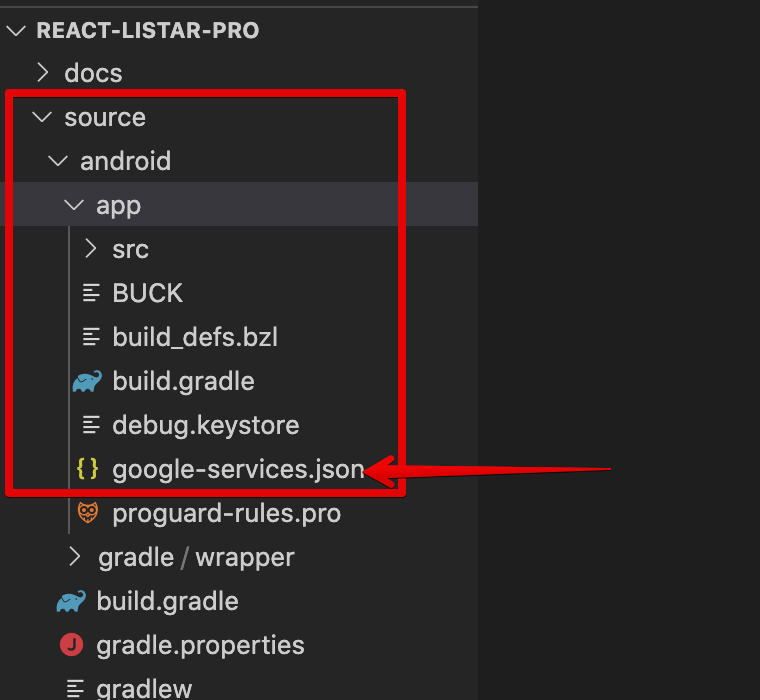
Click on the google-services.json button to download the file then copy it to the android directory of your project ./source/android/app/google-services.json . If the google-services.json file already exists, delete the old file and copy the new file.
After you downloaded config setup then select Next button for complete add Firebase to your Android app.
Then rebuild your project again, please check this Installation > Mobile Setup > https://passionui.com/docs/listar-pro/mobile-installation/mobile-setup
Then move to the next step setting > 2. Setting FCM server key with your WordPress backend
2. Setting FCM Server Key
When you’re going to setup this step, for make sure you have done step 1 > Register FCM server key with your application ID
Please access your WordPress backed and select menu Listar > Settings > Notification > General
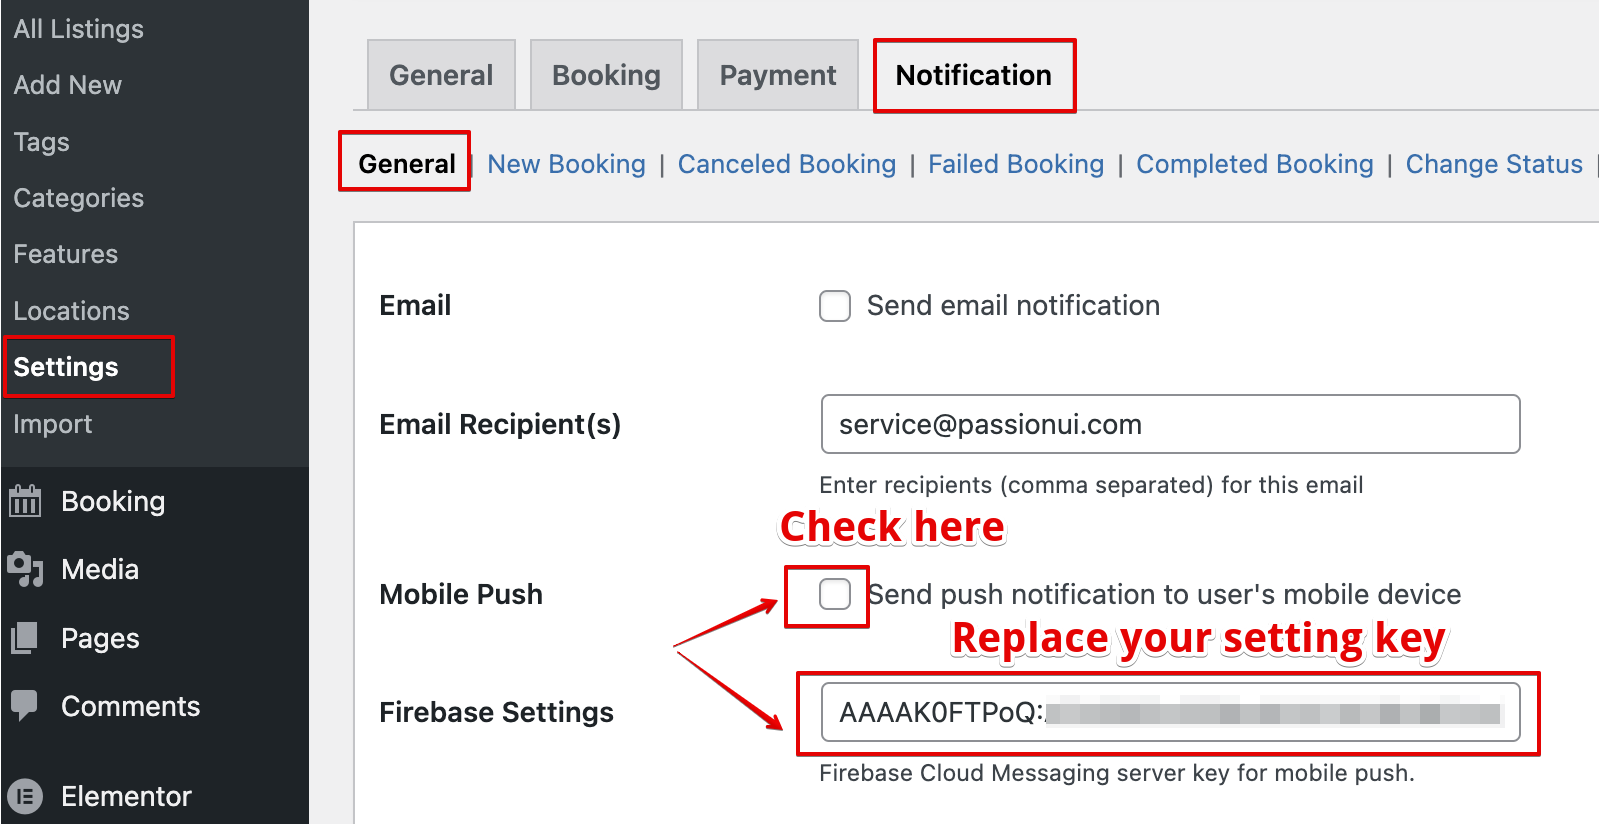
Mobile Push Notification
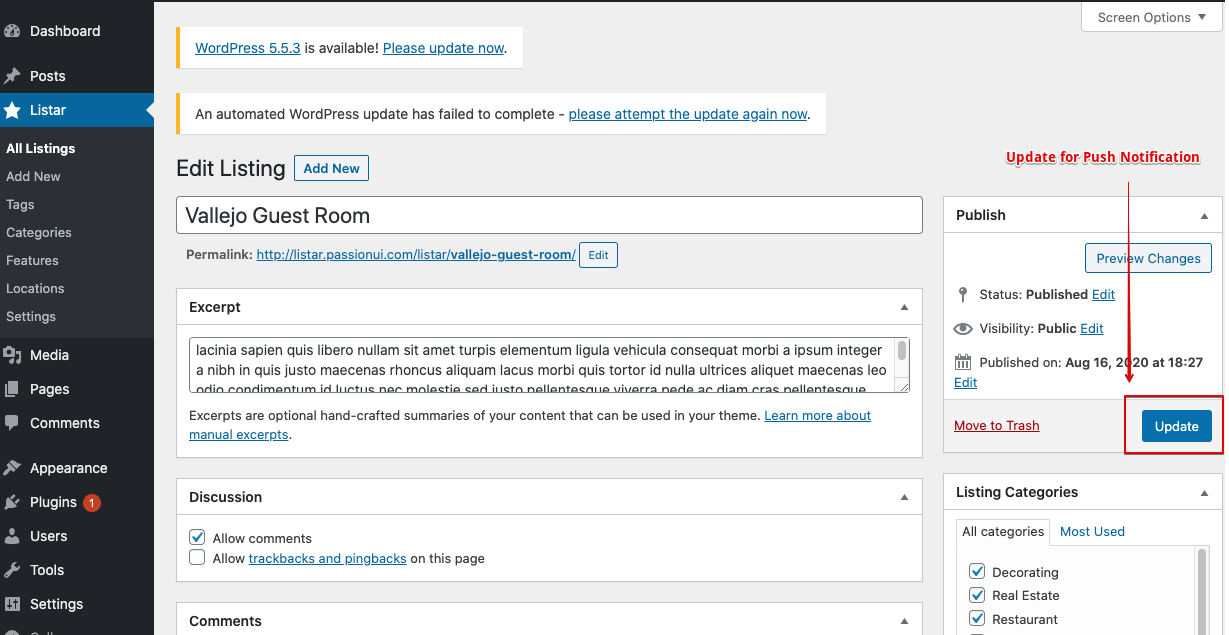
select menu Listar > All Listings then try to add or modify the existing directory listing data. You will see the application push notification work like image below
Mobile Push Message Format
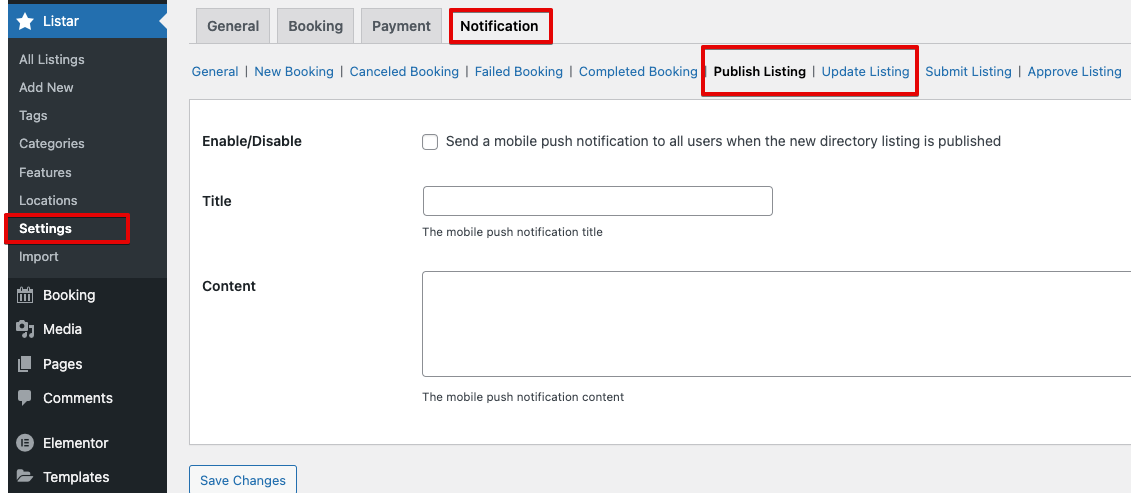
Select menu Listar > Settings > Notification
- Publish Listing: push notification when admin publish new directory listing
- Update Listing: push notification when admin update exist directory listing