Header
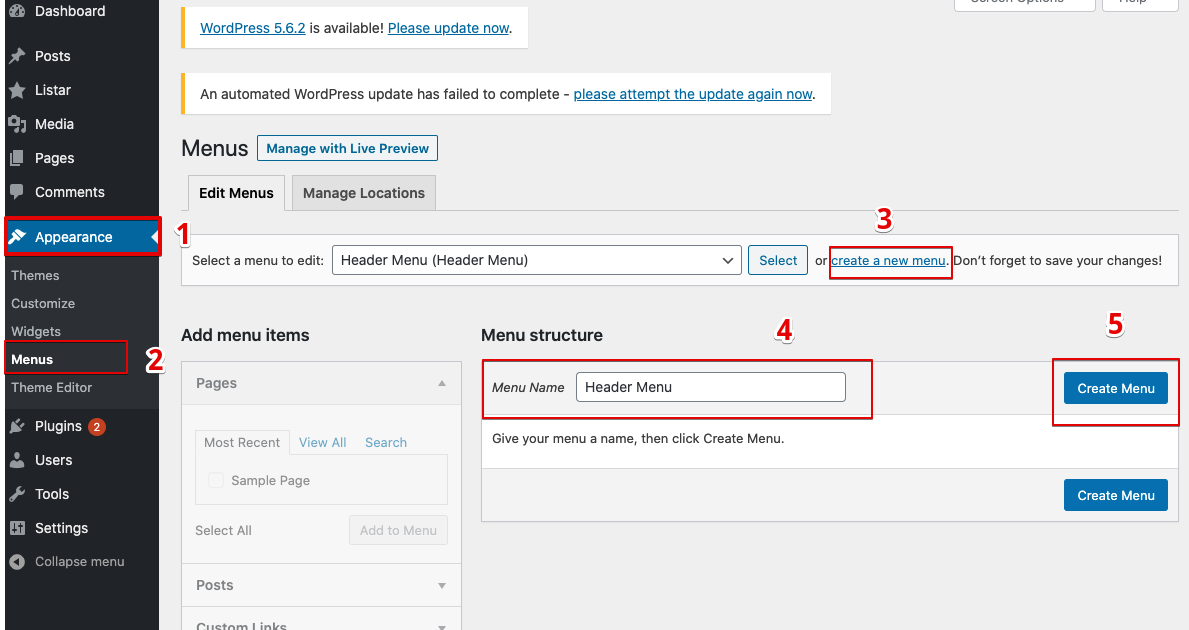
From your WordPress backend, please go to the menu Appearance > Menu and do steps below
- Select create a new menu
- Insert menu nam from the Menu Name field
- Confirm with the button “Create Menu“
- Menu Settings > Display location > select “Header Menu“
From the Add menu items, select section Custom Link and insert data like the sample below
- Home: insert your domain name
- Listing: insert the link http://listar.passionui.com/?post_type=listar , you can replace your domain name and keep the query string post_type=listar
- Contact: select section Add menu items > Page and select page Contact
- About Us: select section Add menu items > Page and select page About Us

Footer
The footer section will have format with 4 columns: Column 1, Column 2, Column 3, Column 4
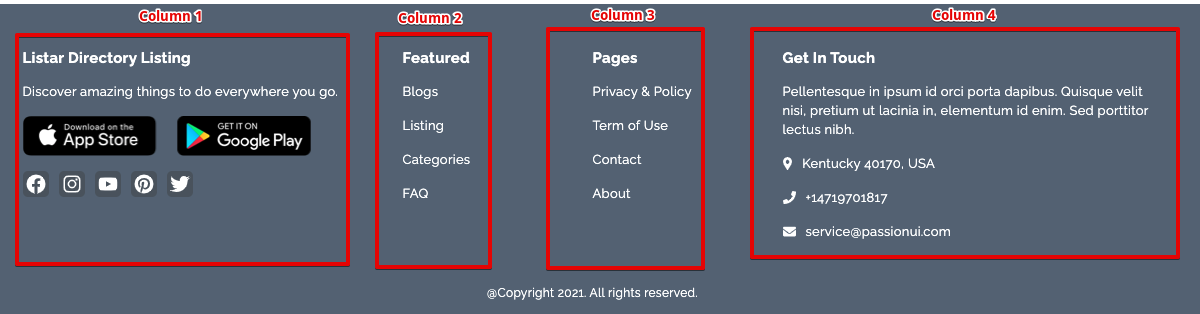
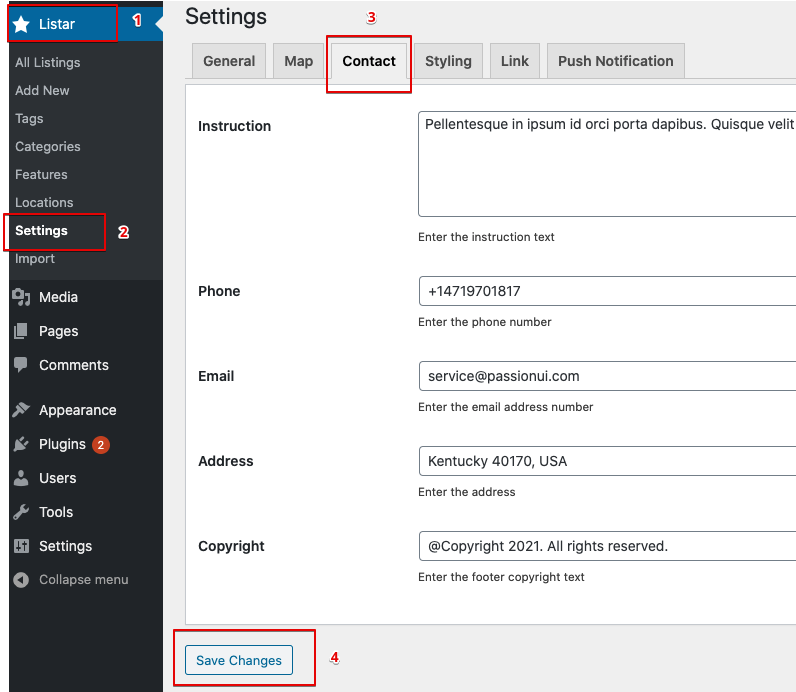
Column 1 & Column 4
Select the menu Listar > Settings then select on these tab Contact and Link for input information for the footer after then save for confirm your information

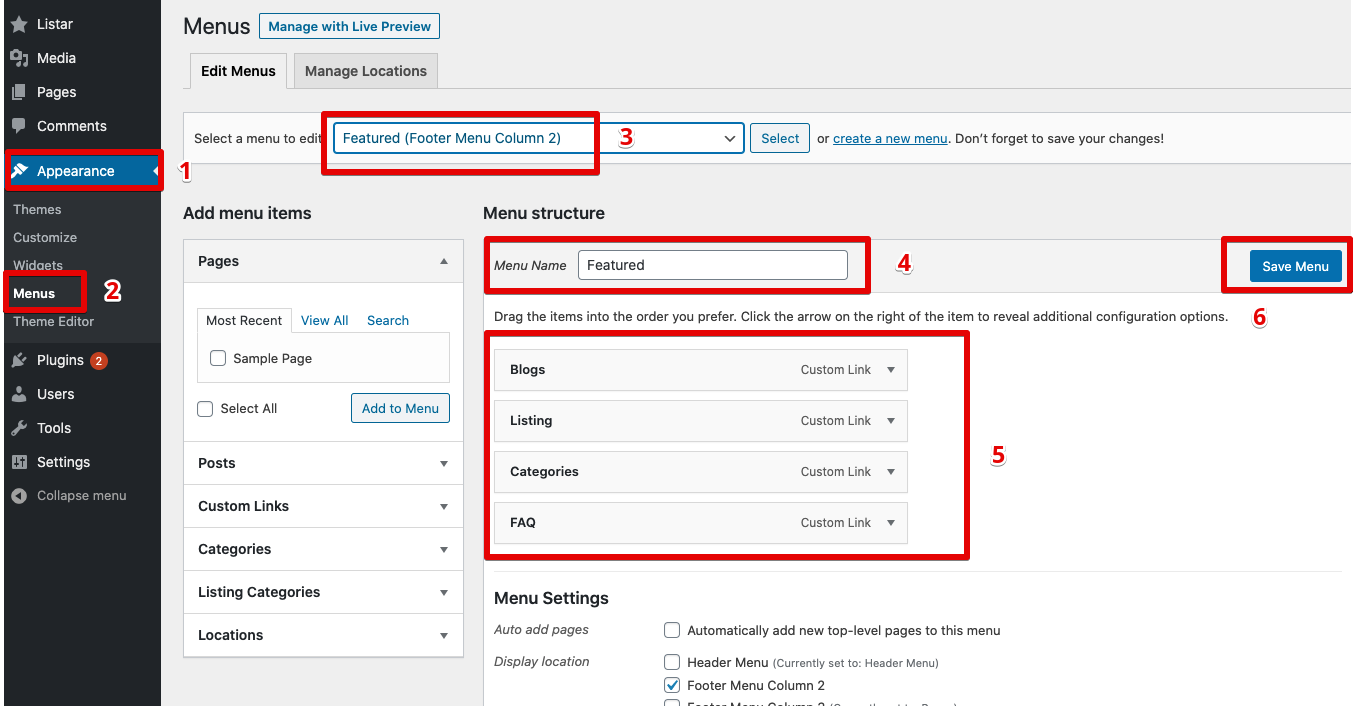
Column 2
Select menu Appearance > Menu and do steps below
- Select create a new menu
- Insert menu nam from the Menu Name field
- Menu Settings > Display location > select “Footer Menu Column 2“
- Confirm with the button “Create Menu“
- From the left side box Add menu items select Customize link or other link
- Confirm by button Save Menu
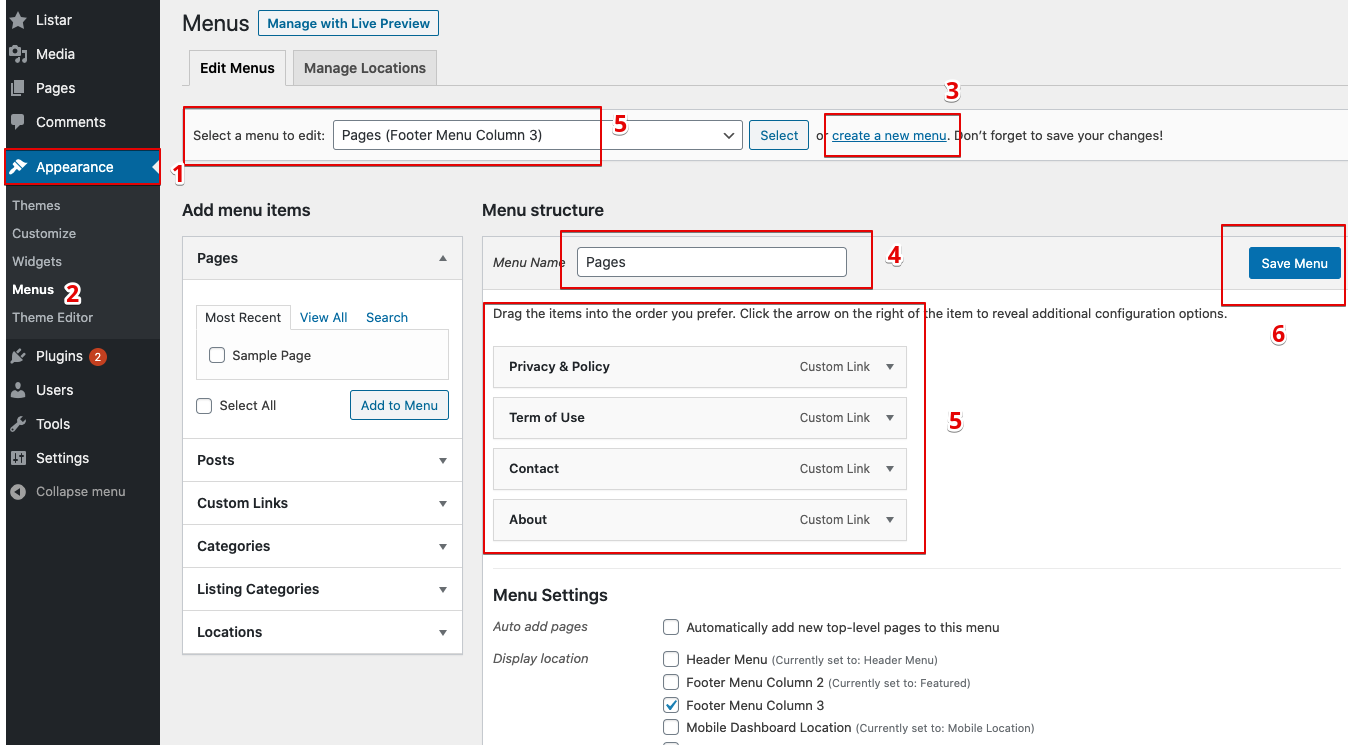
Column 3
Select menu Appearance > Menu and do steps below
- Select create a new menu
- Insert menu nam from the Menu Name field
- Menu Settings > Display location > select “Footer Menu Column 3“
- Confirm with the button “Create Menu“
- From the left side box Add menu items select Customize link or other link
- Confirm by button Save Menu